

Discontinuing CP Filters for Craft CMS Commercial Plugin Sales

We’ve discontinued CP Filters for Craft CMS 5. Lab Reports and Link Vault will be updated. We still use Craft, and want to focus on creating great websites for our clients.

In late 2018, Google Maps began requiring that customers set up a valid billing account to use their services, even if the customer's usage remained below the $200 monthly credit. Most users won't surpass that limit. But if you're wary of entering your credit card info for free tier usage, if your Google Map no longer works because you don't have a valid billing account, or if you just want a unique (or less expensive) map solution, consider switching to Mapbox!
Before we went fully remote and didn't need a map any longer, you could see and interact with our Mapbox map at the bottom of our About page. You could drag the map around, and even hold down the Control (Ctrl) key while dragging to change the angle of the tilt. If you still need a map on your site, read on to see how to implement a Mapbox map.
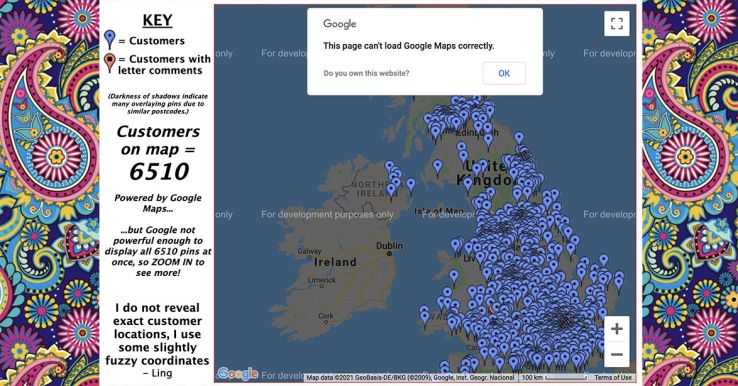
See: even the famous Ling's Cars has a broken Google Map! You can trust Ling, but not this broken map.
As we've detailed in other blog posts, Mapbox is less expensive than Google Maps. You can also create your own map styles, use their really cool 3D maps with Camera and Sky APIs, and do all kinds of fascinating data visualizations. Most importantly, you don't need to enter payment information to use their APIs until you exceed the free tier usage. If Mapbox sounds like what you want, read on to learn how to switch from Google Maps to Mapbox.
Here's a list of useful Mapbox links for getting started:
Once you've created your account and token, we can take stock of what we have with Google Maps and what we want from Mapbox.
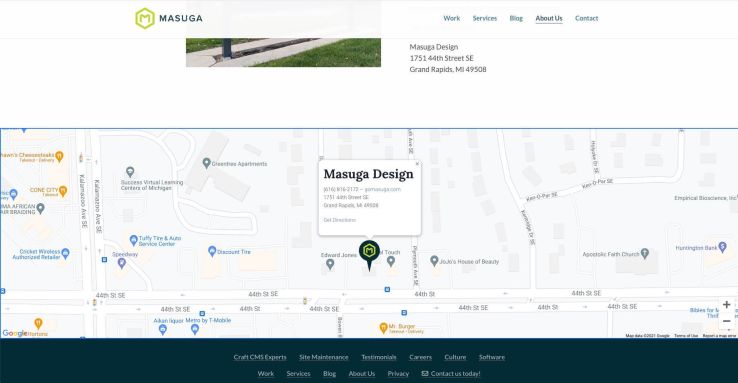
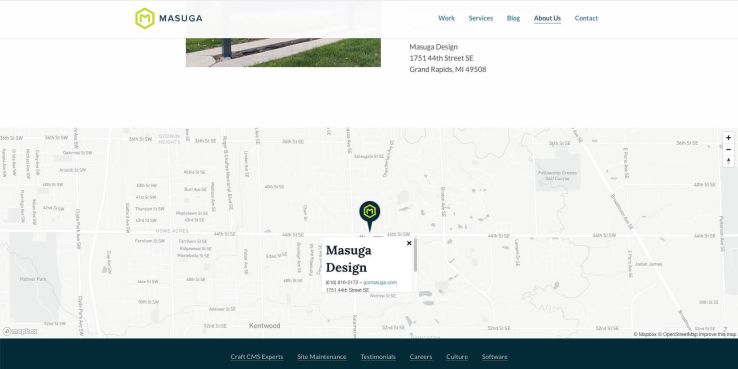
Here's our Google Map:
As you can see, it's a street map with a custom marker and a popup, and it's interactive. Here's the HTML for this Google Maps implementation:
<script defer src="https://maps.googleapis.com/maps/api/js?key=XXXXXXXXXXXXXXXXX"></script>
<!-- Container where Google Map will be displayed -->
<div id="mapCanvas" class="contact-map" data-controller="GoogleMap"></div>
And here's the Javascript:
'use strict';
// This function creates the Google Map, with its options, marker, and info window
$.fn.GoogleMap = function() {
var $self = $(this),
map;
// Define HOW to create the Google Map
function initialize() {
/* M A P */
// Get the element where the map will be displayed
var map_canvas = document.getElementById('mapCanvas'),
// Set all the options for the map
map_options = {
center: new google.maps.LatLng(42.883950,-85.622306),
zoom: 18,
scrollwheel: false,
streetViewControl: false,
fullscreenControl: false,
clickableIcons: false,
mapTypeControl: false,
mapTypeId: google.maps.MapTypeId.ROADMAP
};
// Create a map in that element and with those options
map = new google.maps.Map(map_canvas, map_options);
/* M a r k e r */
// Set the coordinates for the marker
var markerPos = new google.maps.LatLng(42.88397,-85.622300);
// Specify an image to use as the marker
var myIcon = new google.maps.MarkerImage("/path/to/map-pin.png", null, null, null, new google.maps.Size(69,81));
// Create the marker at those coordinates, using that image, on the map
var marker = new google.maps.Marker({
position: markerPos,
map: map,
title: 'Masuga Design',
icon: myIcon
});
/* I n f o W i n d o w */
// Create the html that will become the info window
var contentString = '<div id="mapInfo">';
contentString += '<h3>Masuga Design</h3>';
contentString += '<p>(616) 816-2172 – <a href="https://www.gomasuga.com">gomasuga.com</a><br />';
contentString += '1751 44th Street SE<br />';
contentString += ' Grand Rapids, MI 49508</p>';
contentString += '<p><a href="https://www.google.com/maps/place/1751+44th+St+SE,+Wyoming,+MI+49508,+USA/@42.8846232,-85.6222589,17.99z/data=!4m5!3m4!1s0x8819b33d9275884f:0x4acc775000e434b4!8m2!3d42.8839636!4d-85.6223231" target="_blank">Get Directions</a></p>';
contentString += '</div>';
// Create the info window, using the specified html
var infowindow = new google.maps.InfoWindow({content: contentString});
// On click to the marker, open the info window
google.maps.event.addListener(marker, 'click', function() {infowindow.open(map,marker);});
}
// Run that creation function when the window has been loaded
google.maps.event.addDomListener(window, 'load', initialize);
};
// Run the Google Map creation function
$('#mapCanvas').GoogleMap();
});So we'll need to replace that using the following HTML to convert Google Maps to Mapbox:
<!-- In head tag -->
<script src='https://api.mapbox.com/mapbox-gl-js/v2.1.1/mapbox-gl.js'></script>
<link href='https://api.mapbox.com/mapbox-gl-js/v2.1.1/mapbox-gl.css' rel='stylesheet' />

<!-- In content -->
<!-- Container where Mapbox map will be displayed -->
<div id="mapCanvas" class="contact-map"></div>
<!-- The html content of the popup -->
<div id="map-popup" style="display: none;">
  <div id="mapInfo"><h3>Masuga Design</h3><p>(616) 816-2172 – <a href="https://www.gomasuga.com">gomasuga.com</a><br>1751 44th Street SE<br> Grand Rapids, MI 49508</p><p><a href="https://www.google.com/maps/place/1751+44th+St+SE,+Wyoming,+MI+49508,+USA/@42.8846232,-85.6222589,17.99z/data=!4m5!3m4!1s0x8819b33d9275884f:0x4acc775000e434b4!8m2!3d42.8839636!4d-85.6223231" target="_blank">Get Directions</a></p></div>
</div>
And Javascript:
// Use Mapbox GL JS
var mapboxgl = require('mapbox-gl/dist/mapbox-gl.js');
// The Mapbox API token
mapboxgl.accessToken = 'XXXXXXX.XXXXXXX';
// Create a map of the selected style in the container, centered over the specified point, and at the specified zoom level
var map = new mapboxgl.Map({
container: 'mapCanvas',
style: 'mapbox://styles/mapbox/light-v10',
center: [-85.6224436,42.8839496],
zoom: 13,
antialias: true
});
// Get the html element to populate the popup
var popupElement = document.getElementById('mapInfo');
// Create the popup with that content
var popup = new mapboxgl.Popup()
.setDOMContent(popupElement);
// Create a marker at the specified point, hook the popup up to it, and add it to the map
var marker = new mapboxgl.Marker()
.setLngLat([-85.62230,42.8839400])
.setPopup(popup)
.addTo(map);
// Add some navigation controls to the map
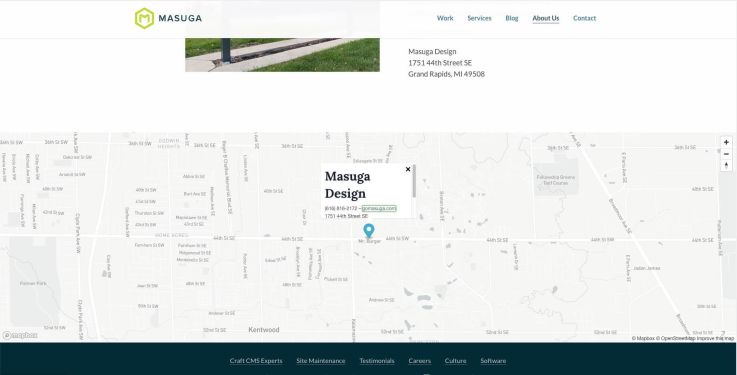
var nav = new mapboxgl.NavigationControl();
map.addControl(nav, 'top-right');And here's the result!
But this Javascript only creates a standard map marker, and we want one with our company logo.
Therefore, we'll add this to our CSS:
.map-marker {
    background-image: url('/path/to/map-pin.png');
    height: 81px;
    width: 55px;
    background-repeat: no-repeat;
    background-position: bottom center;
}
And we'll do this in our JS:
// Change the marker function to this:
// Create an html element with the correct class for styling
var markerElement = document.createElement('div');
  markerElement.className ='map-marker';

// Create a new marker using that element and add it to the map, with coordinates and the popup
new mapboxgl.Marker(markerElement, {
        'anchor' : 'bottom',
    })
    .setLngLat([-85.62230,42.8839400])
    .setPopup(popup)
    .addTo(map);
And here's the result!
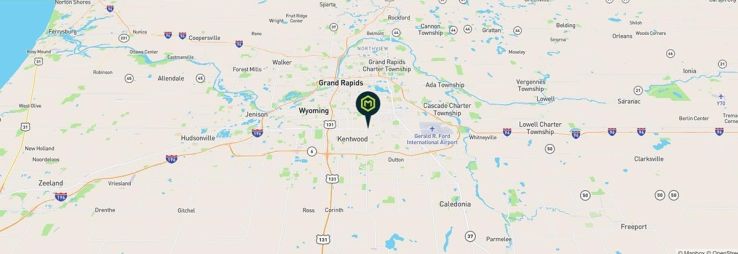
Finally, we decided that we wanted to change up a few options. First, we changed the style from "light" to "streets." That style better suits the angle that we wanted to add to our maps, through the pitch property. We also wanted to make sure that the User could scroll through the site without the map hijacking their scroll. For that, we disabled the scrollZoom property. Here's what our map code looks like after everything is how we want it:
var map = new mapboxgl.Map({
    container: 'mapCanvas',
    style: 'mapbox://styles/mapbox/streets-v11',
    center: [-85.6224436,42.8839496],
    zoom: 10,
    pitch: 45,
    antialias: true,
    scrollZoom: false
});
And here's our final result:
For an example where we used GeoJSON in a Google Maps to Mapbox conversion, check out our blog post "How We Switched from Google Maps to Mapbox."
For a breakdown of why we chose Mapbox over Google Maps, check out our blog post "Switching to Mapbox: the Less Expensive Google Maps Alternative."
If you're in need of a more complex Mapbox implementation or conversion, contact us!
We’ve discontinued CP Filters for Craft CMS 5. Lab Reports and Link Vault will be updated. We still use Craft, and want to focus on creating great websites for our clients.
Shopify's Dawn theme homepage may get an SEO warning for an empty h1 header element. This is a missed opportunity to help search engines understand what your page is about. Small edits to the theme code can fix this technical SEO issue.
Shopify's default Dawn theme displays empty alt tags for collection images. This post explains how to fix blank alt tags for Shopify collection images to improve your Shopify store's accessibility and SEO.